

How to Tie 4 Essential Fly Fishing Knots

Nearly everything in fly fishing is held together by a knot. The backing to the reel, the line to the leader, the leader to the tippet, the tippet to the fly — there is no hardware in the system, no clips or swivels holding it together. Just line tied to line, four or five times over, between you and the fish.
Which means a knot is where your setup breaks. Not the rod, not the reel, and almost never the line itself. When a fish comes off and you reel in a curly pigtail at the end of your tippet, that's a knot that pulled through — and it's usually one that was tied dry, seated too fast, or never really tested.
The good news is that four knots cover almost everything a beginner needs. Not forty. Four. Learn these and you can rig a rod from scratch, replace a leader, add tippet, and change flies all day without help. This guide walks through each one, where it goes in your setup, and how to tie it so it holds.
Where Each Knot Goes
It helps to see the whole system before you start tying. A rigged fly rod is a chain of connections, each one joining a different kind of line to the next: thin braided backing on the reel, thick coated fly line, a clear tapered leader, a fine tippet, and the fly at the end. Every junction needs a knot, and the knot you use depends on what you're joining.
Here's how the four knots in this guide map onto that chain:
The improved clinch attaches your fly to the tippet. This is the one you'll tie most — every fly change, every break-off, potentially a dozen times a day. If you only learn one knot, learn this one.
The perfection loop puts a clean, strong loop in the end of your leader. On its own it doesn't connect anything, but it's the building block for the next one.
The loop-to-loop connection joins your leader to your fly line. Most modern fly lines come with a small welded loop at the tip, so once your leader has a perfection loop, the two link together in seconds — no knot tying required at the streamside.
The blood knot joins two pieces of line of similar diameter. You'll use it to add fresh tippet to a leader that's gotten short, or to build your own leaders from scratch.
If the terms backing, leader, and tippet are new, our complete guide to rigging a fly rod walks through the whole chain with diagrams before you tie a single knot.
Four Rules That Apply to Every Knot
Wet the knot before you tighten it. This is the single most important habit in this entire guide, and it's the one beginners skip. Pulling a knot tight while it's dry generates friction, and friction generates heat, and heat weakens monofilament right at the point where all the load will be. Saliva works fine. So does dunking it in the river. Just don't cinch anything dry.
Seat it slowly and smoothly. Pull steadily rather than yanking. You want the coils to draw down and nest against each other evenly. A knot that's jerked tight tends to bunch up unevenly, and an uneven knot is a weak one.
Trim close, but not into the knot. Leave about a sixteenth of an inch of tag end. Trim flush and you risk the tag slipping back through under load; leave too much and it catches weeds, picks up drag, and can spook fish. Nippers make this easy — scissors and teeth do not.
Test it before you fish it. Give the knot a firm, steady pull. It is far better to find a bad knot standing on the bank than to find it when a fish is on. If it slips, cut it off and tie it again — retying takes thirty seconds and costs nothing.
📌 Pro Tip: Practice these at home with a piece of heavy line and a hook with the point cut off. Heavier line is far easier to see and manipulate than 5X tippet, and your hands will learn the motion much faster. Once the sequence is automatic, dropping down to thin tippet is a small adjustment rather than a whole new skill.
The Improved Clinch Knot
Tippet to fly. The one you'll tie most.
The improved clinch is the standard terminal knot in fly fishing — it attaches a dry fly, nymph, or streamer to your tippet or leader. It's quick, it's strong, and it's the knot you'll be tying with cold hands in fading light when a hatch is coming off, so it's worth getting truly automatic.
The "improved" part is the final pass through the big loop. A plain clinch knot skips that step and slips far more often, especially in heavier line. Don't skip it.

How to Tie an Improved Clinch Knot
- Thread the end of the tippet through the eye of the hook.
- Pull about six inches through and double it back alongside the standing line.
- Twist the tag end around the standing line five to seven times.
- Pass the tag end back through the small loop formed just behind the hook eye, then through the large loop you just created.
- Wet the knot, then pull steadily on the standing line to draw the coils down neatly.
- Seat the knot snug against the hook eye and trim the tag end close.
Use more wraps with fine tippet and fewer with heavy material. Five or six is right for most trout fishing in 4X to 6X. Drop to four in stiff, heavy line, where too many wraps make the knot bulky and hard to seat.
If you'd rather watch it done, the video at the top of this post covers all four knots start to finish.
The Perfection Loop
A clean loop in the end of your leader.
The perfection loop earns its name — it forms a loop that sits perfectly in line with the standing line rather than cocked off at an angle, which matters because a straight loop transfers energy cleanly through the cast.
You'll tie this in the butt end of a leader so it can link to your fly line, and it's also useful anywhere you want a fixed loop in a piece of line.

How to Tie a Perfection Loop
- Form a loop by crossing the tag end behind the standing line.
- Form a second loop in front of the first, in the same direction. The size of this second loop determines the size of your finished loop.
- Bring the tag end across and hold it between the two loops.
- Reach through the front loop, grab the back loop, and pull it through.
- Wet the knot and tighten by pulling the loop and the standing line in opposite directions. Trim the tag end close.
Keep the finished loop small — about the size of a pencil eraser. A large loop hinges in the cast and can catch on your rod guides when you bring a fish close.
The Loop-to-Loop Connection
Leader to fly line, in about five seconds.
This isn't really a knot — it's a way of joining two existing loops. Most fly lines come from the factory with a small welded loop at the tip. Put a perfection loop in the butt of your leader and the two connect instantly, with no tools and no tying.
That's the real advantage: when your leader gets short and beat up after a few days of fishing, you can swap in a fresh one streamside in seconds, with cold hands, without tying anything.

How to Make a Loop-to-Loop Connection
- Pass the loop on the fly line through the loop on the leader.
- Run the far end of the leader through the loop on the fly line.
- Pull the fly line and the leader in opposite directions until the loops slide together and seat into a square, interlocking connection.
📌 Pro Tip: Check that the two loops seat square against each other, forming a neat interlock rather than one loop cinching down into a girth hitch. A girth hitch puts a sharp bend in the line, creates a weak point, and hangs up in your guides. If it looks wrong, back it apart and reseat it.
The Blood Knot
Joining two lines of similar diameter.
The blood knot is how you add fresh tippet to a leader that's gotten short from repeated fly changes, and how you build tapered leaders from scratch. It's the hardest of the four, and it's the one worth practicing at home rather than learning on the water.
It works best when the two lines are close in diameter — within one or two X sizes. Try to join 3X to 6X with a blood knot and it will slip.

How to Tie a Blood Knot
- Cross the two pieces of line, leaving several inches of tag on each.
- Wrap one tag end around the other line five times, working away from the crossing point.
- Bring that tag end back and pass it through the gap at the original crossing. Pinch it there with your thumb and forefinger.
- Wrap the other tag end around the opposite line five times, in the opposite direction.
- Pass that tag end through the same gap, from the other side, so the two tags exit in opposite directions.
- Wet the knot thoroughly.
- Pull both standing lines steadily apart until the wraps draw down and nest together.
- Trim both tag ends close.
Five wraps per side is the standard. Go up to seven with very fine tippet, where more wraps add grip. The wraps should end up evenly nested and symmetrical — if one side looks bunched, cut it off and start over.
Ready to Go Further?
These four will handle almost every situation a new angler runs into. But as you fish more, a few more connections become useful — and a couple of them solve problems these four can't.
The arbor knot attaches backing to your reel spool. You'll tie it exactly once per reel, but you can't spool up without it.
The nail knot joins fly line directly to a leader butt, creating a slim connection that slides through the guides more cleanly than a loop-to-loop. It's the traditional choice if your fly line doesn't have a welded loop.
The surgeon's knot does the same job as a blood knot but is far easier to tie, especially with cold hands or in low light. It's slightly bulkier, and many anglers use it anyway.
The non-slip loop knot attaches a fly with an open loop instead of cinching tight to the hook eye, letting streamers and larger flies swing and move more freely in the water.
All of these and more are covered in our complete guide to essential fly fishing knots.
What You're Tying With
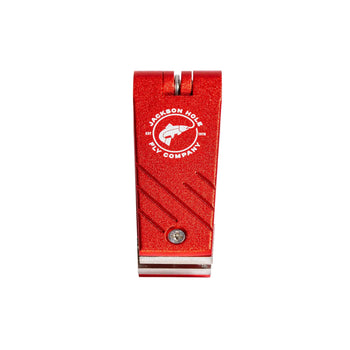
Knots are only as good as the material and the tools. Fresh tippet ties and holds far better than line that's been sitting in a hot truck for two seasons, and a real pair of nippers makes a clean trim that scissors can't.
 |
 |
 |
 |
| Tapered Leader — 3 Pack | Monofilament Tippet | Pro Nippers | Essential Streamside Toolkit |
Tapered leaders come three to a pack because you will eventually cut one too short. A spool of tippet extends a leader's life considerably — add a foot or two with a blood knot instead of replacing the whole thing. Nippers give you a clean, close trim without nicking the standing line, which scissors and teeth both tend to do. And the Essential Streamside Toolkit puts nippers, forceps, and a zinger on one clip, so the tools are on you rather than in the truck.
Not sure which leader or tippet size you need? Our guide to choosing the right leader and tippet explains the X-sizing system in plain language.
Practice Beats Memorizing
Nobody learns knots by reading about them. Sit down with a length of heavy mono and a cut-off hook, and tie each of these ten times in a row. Your hands will remember the sequence long after your brain has stopped narrating it — which is exactly what you want when a fish is rising twenty feet away and you're trying to change flies before the hatch ends.
Wet every knot. Seat it slowly. Trim it close. Test it before you fish it. Do that consistently and you'll lose far fewer fish than the angler next to you.
Related Articles
- Essential Fly Fishing Knots: 10 Key Ties for Angling Success
- How to Rig Your Fly Rod: A Complete Beginner's Guide
- Choosing the Right Leader & Tippet for Fly Fishing Success
- How to Cast a Fly Rod: A Beginner's Guide
- Reading Water 101: Where Trout Actually Hold
- 25 Essential Flies: A Beginner's Guide to Building the Perfect Fly Box
- Catch and Release Done Right: Ensuring a Healthy Future for Our Fish
- Starting Your Fly Fishing Journey: A Beginner's Guide
- Browse All Beginner's Guides →


